The Ultimate Guide: How to Print ID Card Front and Back in One Page Perfectly
Let's be honest: trying to print a double-sided ID card can be a total nightmare. You spend ten minutes carefully aligning the front side, you flip the paper, you hit print for the back, and... bam! The back is shifted by half an inch, or worse, it's printed upside down. You've wasted paper, you've wasted ink, and you've lost your patience.
Whether it's a National ID (CNIC), a Driver's License, or a corporate employee badge, the goal is always the same: a clean, professional-looking print where the front and back align perfectly on a single sheet of paper. But how do you actually achieve this without being a Photoshop expert? The solution is far simpler and quicker than you might expect. In this guide, we will show you exactly how to print id card documents like a pro using the free tool at AllToolPDF.com.
Why is Printing ID Cards So Tricky?
If you've ever wondered why it's so hard to print front and back id card on single page, it comes down to a technical problem called "Duplex Alignment."
Standard home and office printers rarely pull paper through in an exact, straight line. There is always a slight deviation. Furthermore, when you flip a piece of paper manually, the "Top-Left" of the front side becomes the "Top-Right" of the back side. If you just print the same image in the same spot, the back will never line up with the front.
To solve this, you need a tool that uses a Mirror Alignment Algorithm. Instead of just placing images, the tool calculates the exact coordinates so that when the paper is flipped, the back image lands exactly behind the front image. This is where our tool becomes a lifesaver.
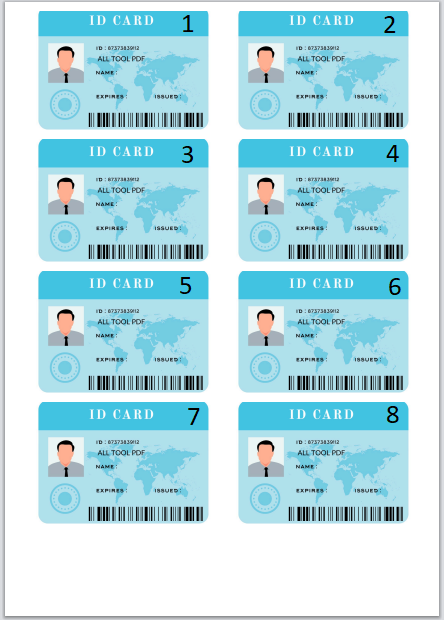
Introducing the All Tool PDF ID Card Printer: More Than Just a Cropper
Most online tools only let you crop an image. But real-world photos are rarely perfect. You might have taken the photo at an angle, or the lighting might be too dark. We've built a professional-grade utility that handles the "real-world" problems of how to print id card copy from printer.
1. The "Seda" Feature: Perspective Warp Transformation
This is the core strength of our tool. Have you ever taken a photo of your ID card, but the image looks like a trapezoid because you held the phone at an angle? Normally, you'd have to crop a lot of the image away to make it straight, which ruins the quality and resolution.
Our tool uses Perspective Warp. Instead of a simple square crop, you get four interactive corner handles. You place these handles on the actual corners of your ID card in the photo, and the tool "stretches" the image mathematically to make it a perfect rectangle. No matter how "teda" (tilted) your photo is, the tool makes it "seda" (straight) and professional, ensuring the final print is exactly 86mm x 54mm.
2. Magic Scan: Fixing Dark and Blurry Photos
ID cards are often glossy, and camera flashes can create weird shadows or make the image too dark. Our Magic Scan feature allows you to adjust brightness and contrast in real-time. With one slider, you can turn a dull, gray scan into a bright, high-contrast document that looks like it came from a professional Xerox machine. This ensures that every detail, from the ID number to the small text, is legible after printing.
Step-by-Step Guide: How to Print Multiple ID Cards on One Page
Ready to get started? Follow these steps to print multiple id cards on one page without any errors.
Step 1: Upload and Straighten (The Front Side)
- Click "+ Add New Card" and upload the photo of the front side.
- Once the image loads, you will see four blue corner handles. Move these corner handles directly to the four outer edges of your ID card.
- The Perspective Warp will automatically straighten the image, making it perfectly rectangular.
- If the image is dark, click the Brightness Icon and slide it up until the text is crisp.
- Click "Crop & Save."
Step 2: Repeat for the Back Side
The tool will immediately ask you for the back side. Repeat the same process: align the corners to make the image "seda," adjust the brightness, and save. This ensures both sides are the exact same size for perfect alignment.
Step 3: Layout Selection (A4 Format)
Now you can decide how you want your pages to look. The tool provides the standard id card print format A4 size. You can choose between:
- Horizontal Layout: Best for standard IDs, allowing you to print multiple id cards on one page (up to 8 per sheet).
- Vertical Layout: Ideal for portrait-style cards, fitting 6 per sheet.
If you are wondering how to fit 4 id cards on one page, simply add 4 cards to your list and the tool will automatically arrange them in a clean, balanced grid.
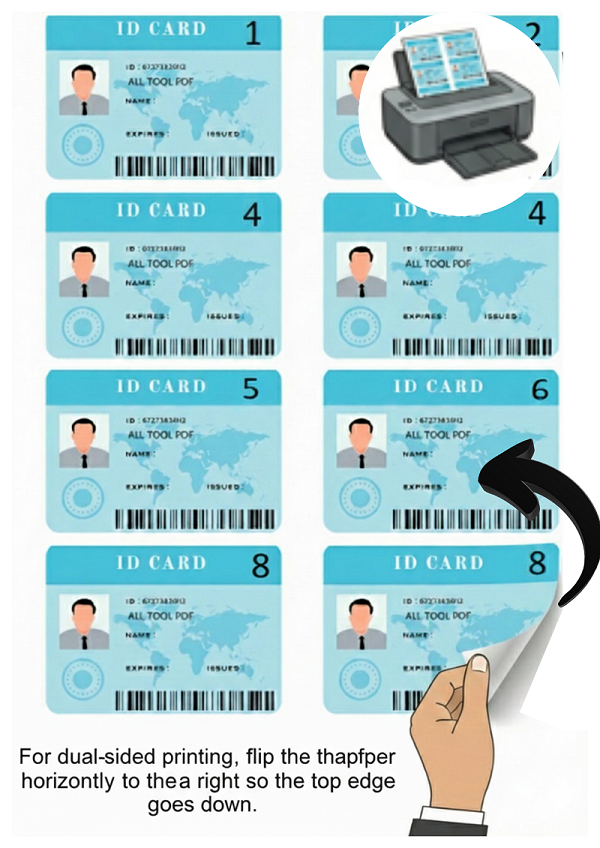
Step 4: The Two-Step Printing Process
This is the most important part to ensure the front and back are perfectly aligned:
- Print Fronts: Click "Step 1: Print Fronts." This will generate a page with all your front-side images. Print this page first.
- The Flip: Take the printed page out of the tray. Flip it according to your printer's duplex requirements (usually flipping it over the short edge).
- Print Backs: Put the paper back in and click "Step 2: Print Backs." The tool automatically mirrors the position of the images so the back side prints exactly behind the front side.
Professional Tips for High-Quality ID Prints
To get a result that looks like it was made in a professional print shop, keep these tips in mind:
- Lighting is Key: When taking the photo, avoid using a direct flash to prevent "hot spots" (bright white circles) on the glossy surface of the card. Natural light near a window is best.
- Contrast Matters: Use the Magic Scan tool to increase contrast. High-contrast images look much sharper when printed on standard A4 paper.
- Paper Quality: If you want a more durable result, use a slightly thicker paper (around 120-160 GSM) or a photo-quality matte paper.
- Test Print: If you are printing a large batch, always do a test print with one card first to make sure your printer's "flip" direction is correct.
Security and Privacy: Your Data Never Leaves Your Device
When dealing with ID cards, privacy is the number one concern. Most online tools upload your photos to a server, process them, and then send them back. This is a huge security risk.
All Tool PDF is different. Our tool is 100% client-side. This means all the "magic"—the Perspective Warp, the Magic Scan, and the Alignment—happens inside your web browser. Your sensitive ID photos never leave your computer and are never uploaded to any server. You can use our tool with complete peace of mind.
Frequently Asked Questions (FAQs)
Can I print different ID cards on the same page?
Yes! You can upload up to 8 different ID cards. The tool will organize them all on one A4 sheet, and the mirroring logic will still work perfectly for each individual card.
What happens if my image is still tilted after cropping?
If the image is still tilted, it means the corner handles weren't placed exactly on the corners of the card. Simply click "Reset" or start the card again and ensure the handles are precisely on the edges of the ID.
Is this tool compatible with all printers?
Yes, it works with any printer that can print A4 size paper. Since we generate a standard print layout, it doesn't matter if you use HP, Canon, Epson, or a professional laser printer.
Conclusion: Professional Results in Seconds
You no longer need to struggle with manual measurements or expensive software to print front and back id card on single page. By combining the power of Perspective Warp to straighten images and a Mirror Alignment Algorithm to handle the duplex flip, All Tool PDF makes professional ID printing accessible to everyone.
Stop wasting paper and start printing with precision. Whether you need a single copy for a government application or a batch of 50 for a new office team, our tool ensures a perfect, "seda," and professional result every single time.